How to take bookings and RSVPs without the back-and-forth
A step-by-step guide to Calendar: set your hours, put a booking form and a class with limited places on your site, run an event people can RSVP to, and see it all in one place.

"Are you free Thursday?" "How about 2?" "Sorry, I meant next week." Every booking by email takes four messages. Calendar puts your free times on your site, so people choose one themselves, and keeps your events, bookings and to-dos on one calendar.
This guide follows our made-up company, ACME Ltd, a tools and workshop supplier that runs sharpening appointments and woodworking classes.
1. Set your hours
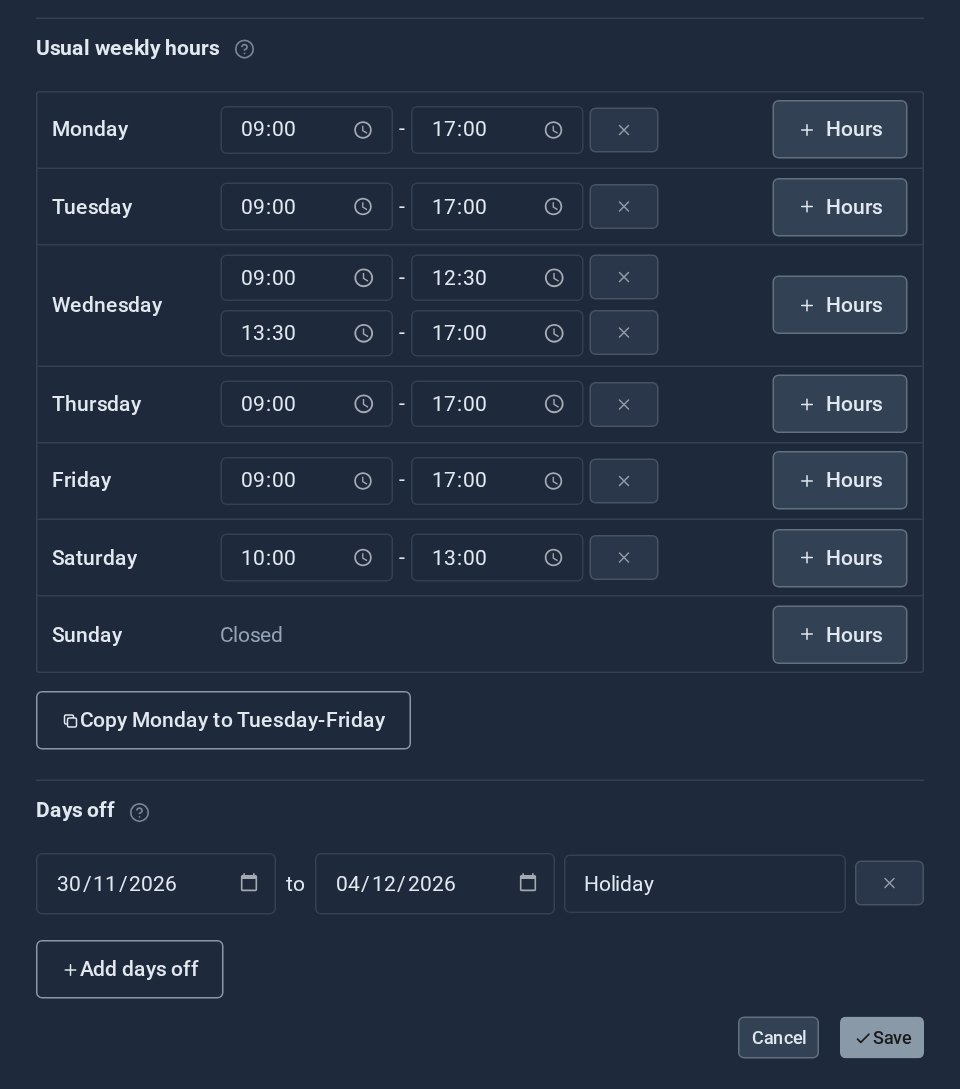
Open Availability and set each person's usual week: the days and hours they take bookings, split days if they stop for lunch, and holidays. Bookings can only land in time that is free.
2. Put a booking form on your site
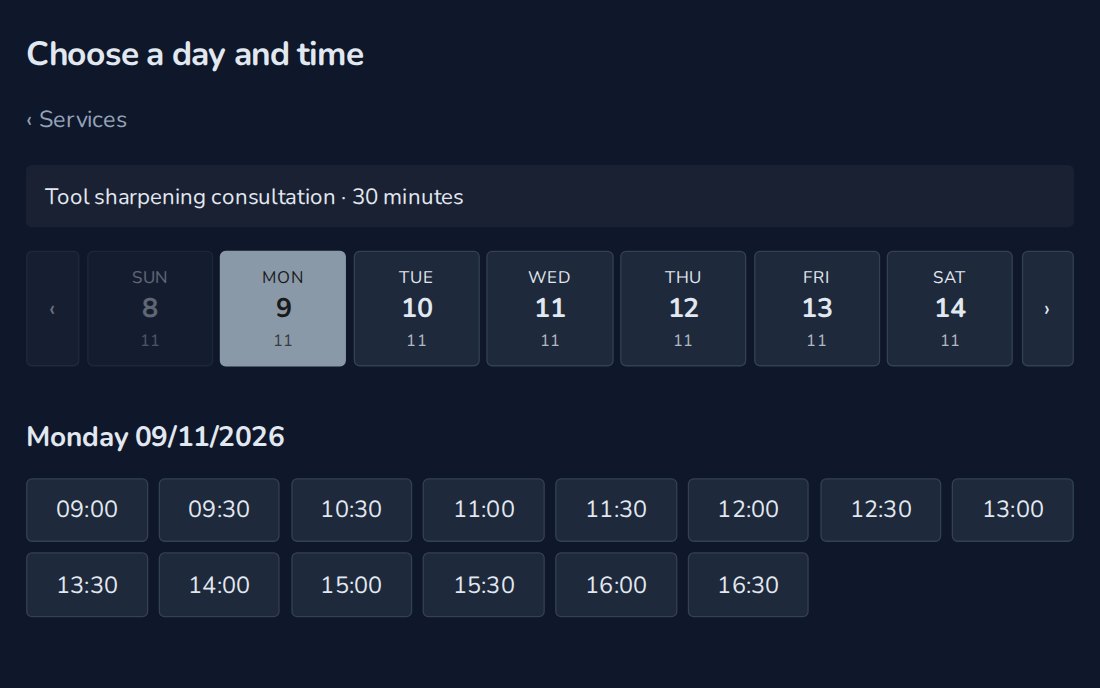
Your customers pick a day, then a free time, and fill in their details. The booking lands straight on your calendar, and nobody can take a time that has gone.
3. Run a class with limited places
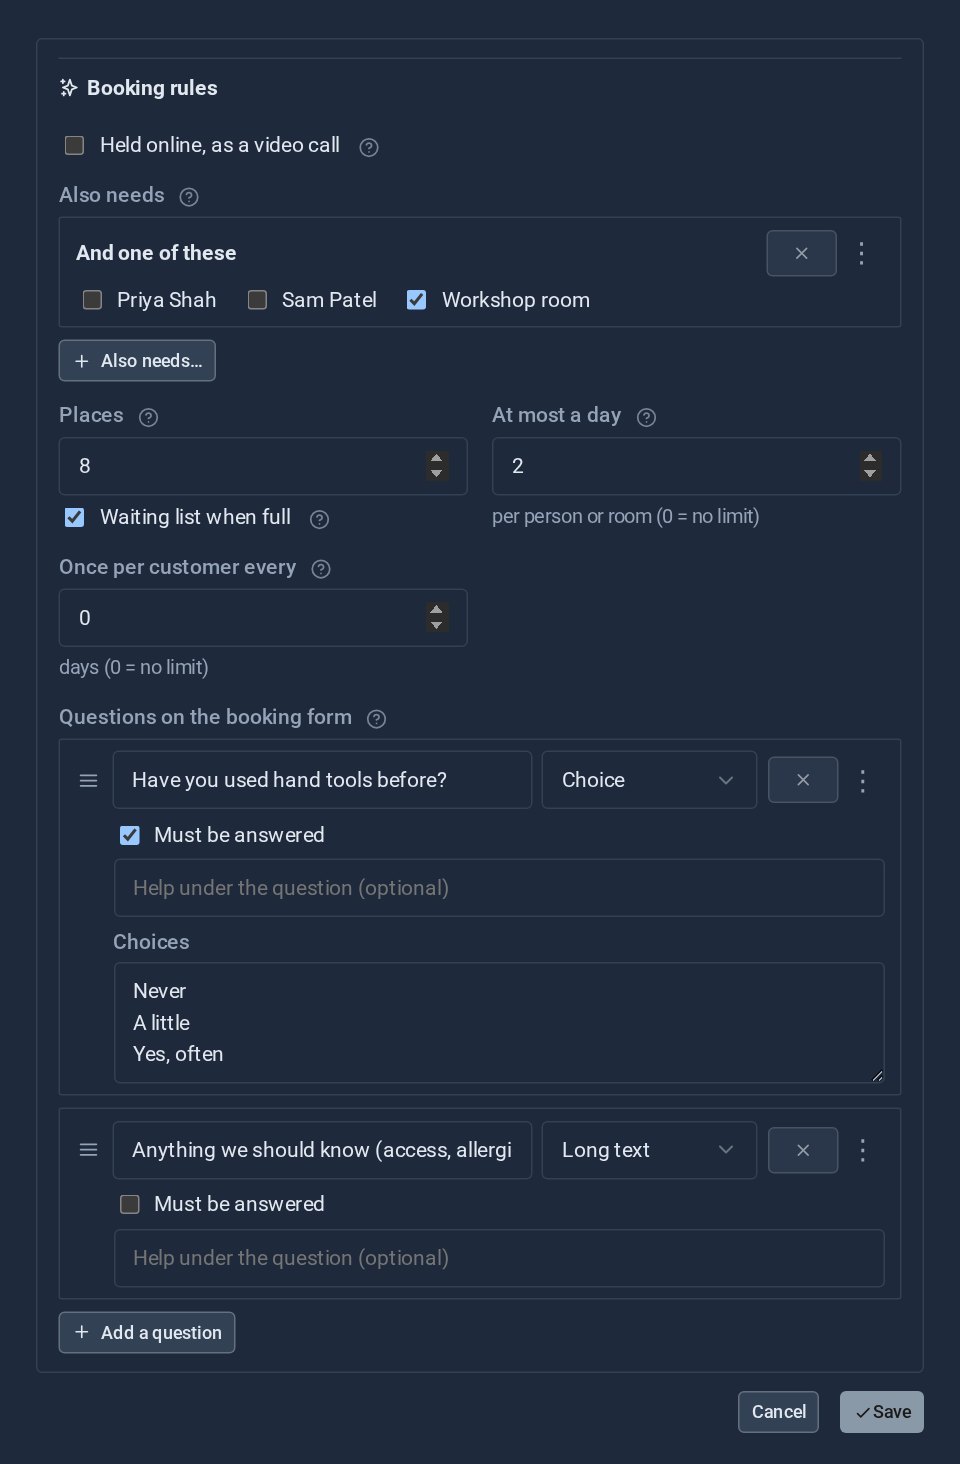
For a class, set the number of places. When it is full, people join the waiting list instead. You can tie a class to the room it needs, and add questions to its booking form, such as experience level.
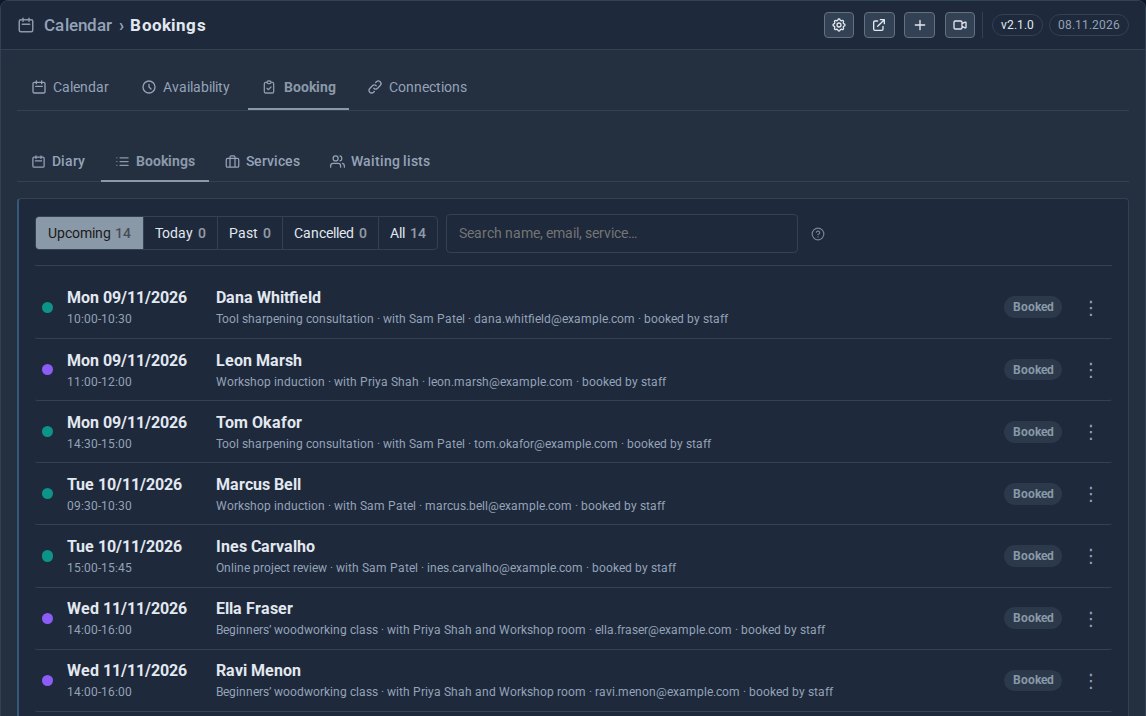
Every appointment and class place is listed under Bookings, with who it is with.
4. Run an event people can RSVP to
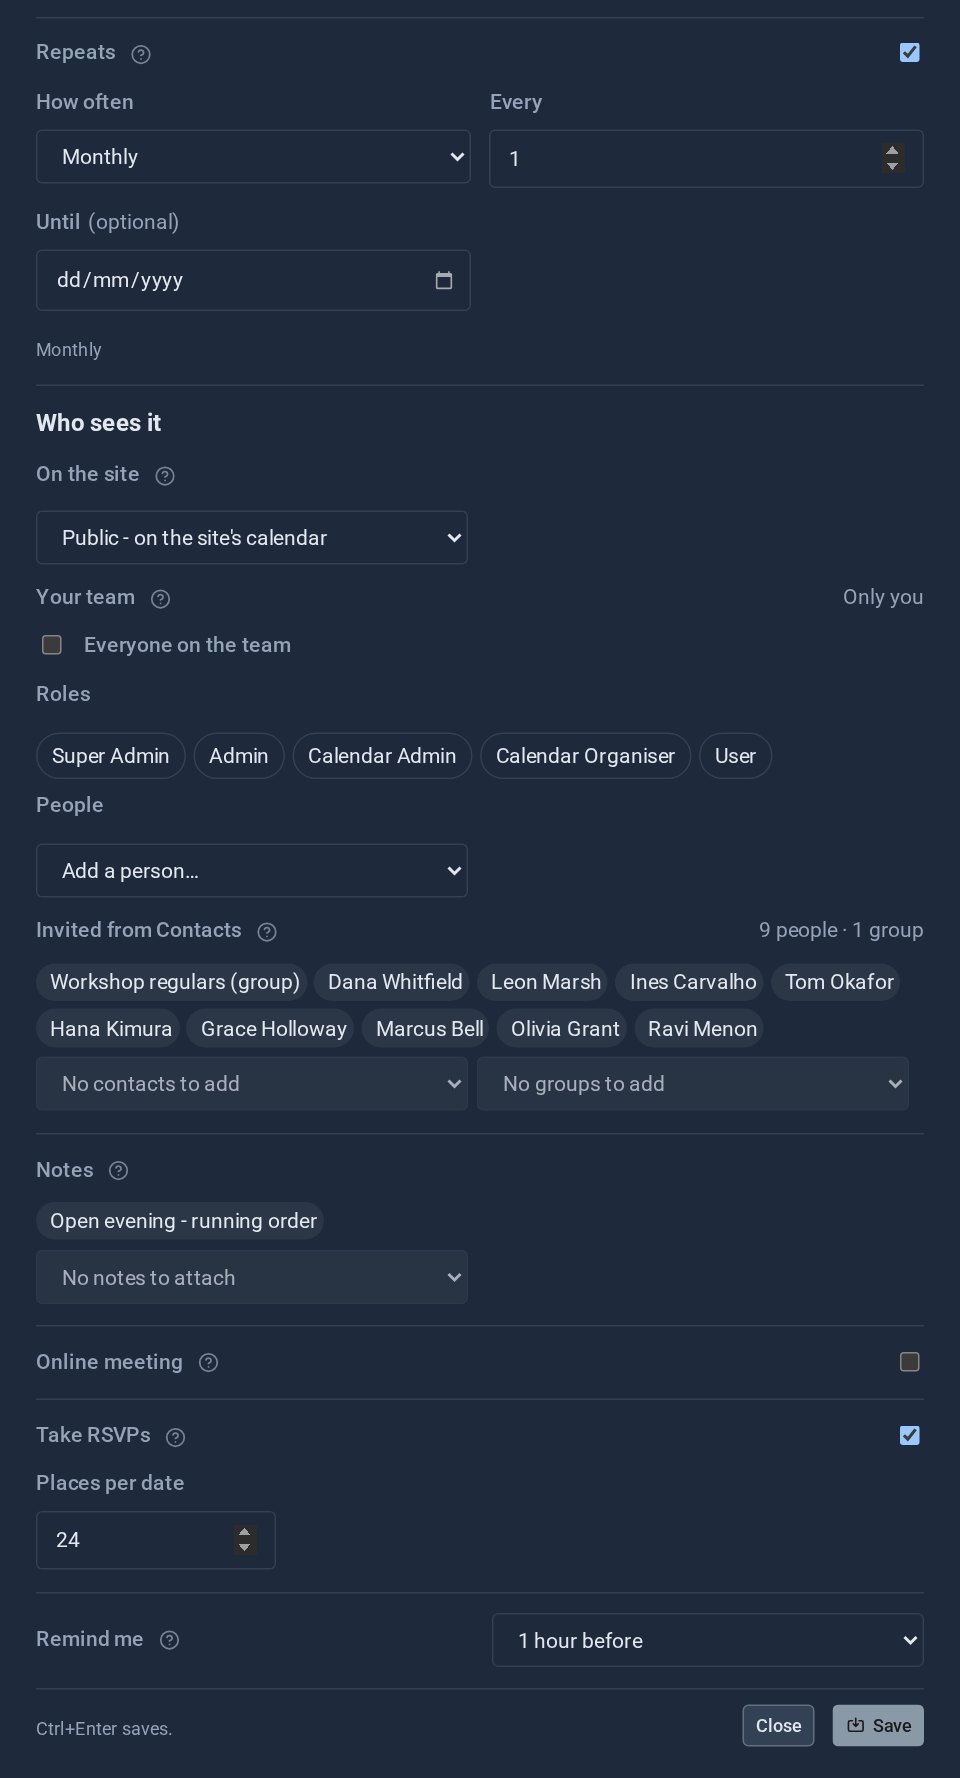
An open evening, a launch or a trade show is an event. Make it repeat if it happens every month, put it on your site, invite a Contacts group, set a limit on places and a reminder for yourself.
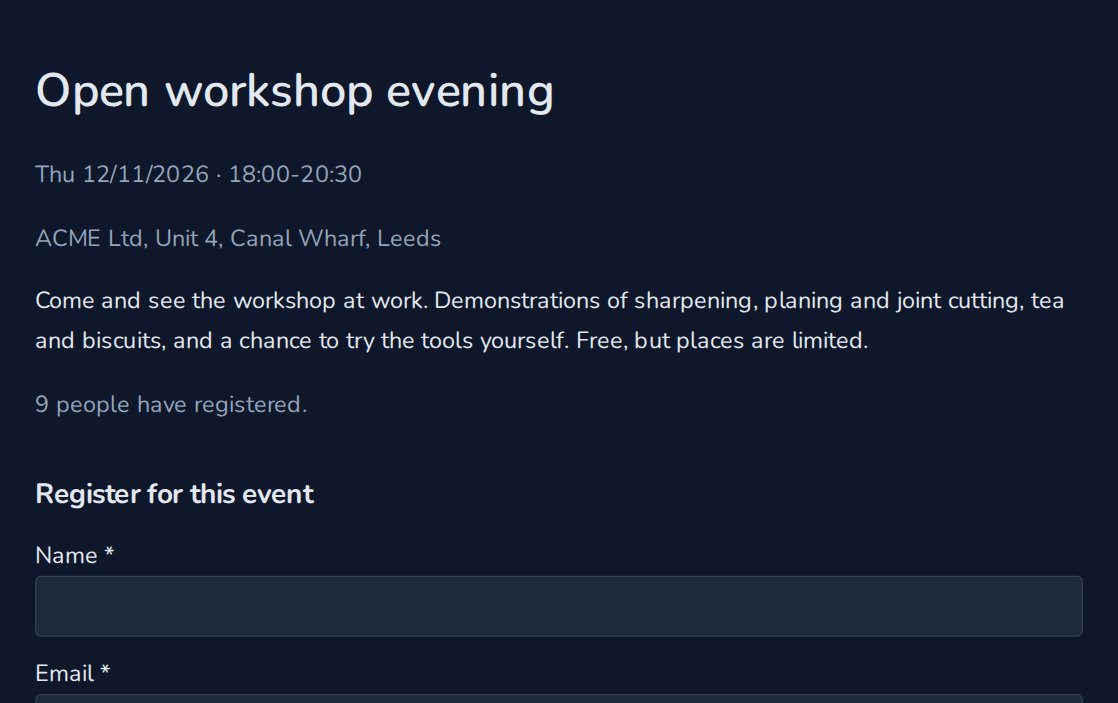
Each public event gets its own page on your site with an RSVP form. Your site's calendar at /calendar lists them all, and people can subscribe to it in their own calendar app.
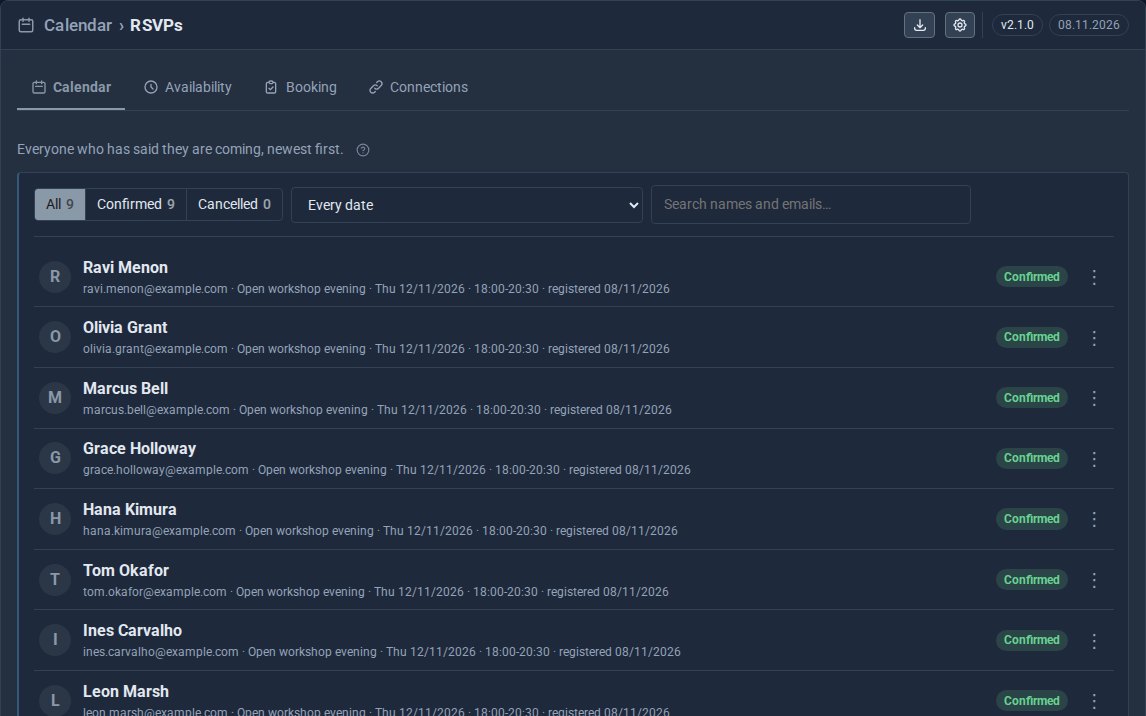
Everyone who is coming is under RSVPs. Filter by date or status, email them, or export the list.
Not every event should be public. Keep a private one for your team, or send its page to a few people through a private link.
5. Meet online
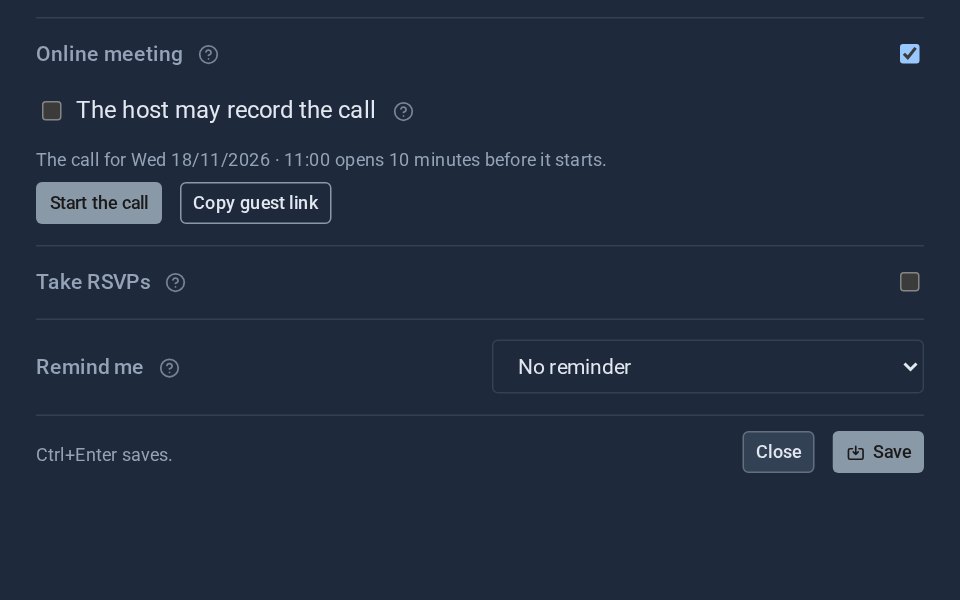
Turn on Online meeting for an event or an appointment and Calendar gives it a video call. Start the call as the host, or copy the guest link to send.
6. See it all in one place
The month view shows events in their type colours, with bookings and to-dos alongside. Switch layers off when you only want one kind. If you use Google Calendar, connect it once and it joins in too.
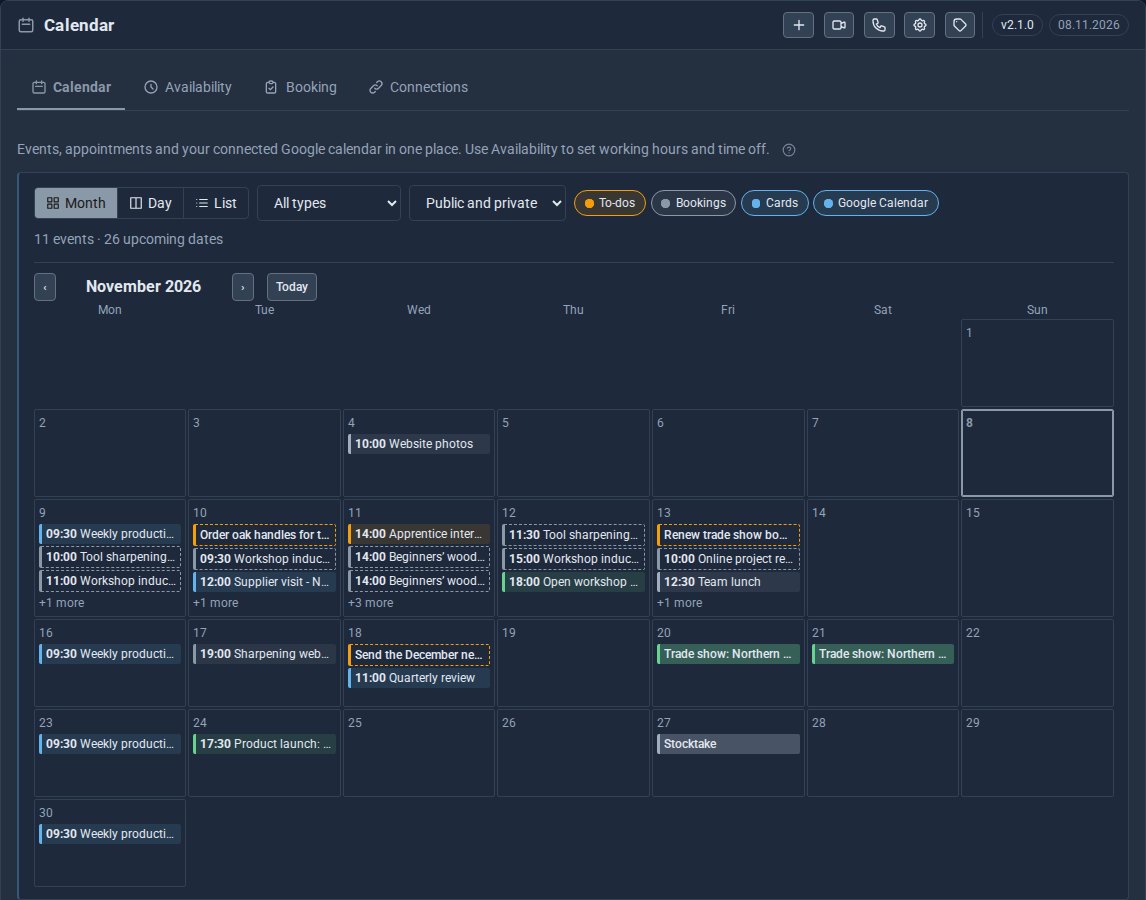
The sidebar badge tells you what is on today. Hover it for today, on now, the next 7 days and this week's RSVPs.
Quick checklist
- Set your hours under Availability.
- Put the booking form on your site.
- Give classes a place limit; let the waiting list do the rest.
- Make events public, with RSVPs and a place limit.
- Turn on Online meeting when people are far away.
The screens above come from our made-up demo company, ACME Ltd.
What your customers see when they book online
Before you switch on online booking, it helps to know exactly what your customers will see. This guide walks through the journey in Calendar as a customer takes it, from the first click to the day they change their mind.
Our example is the made-up ACME Ltd, which books sharpening appointments, online advice sessions and a woodworking class. For setting up your hours and classes, see How to take bookings and RSVPs.
1. Choose what to book
The first step lists what you offer, each with how long it takes, how many places a class has, or that it happens online.
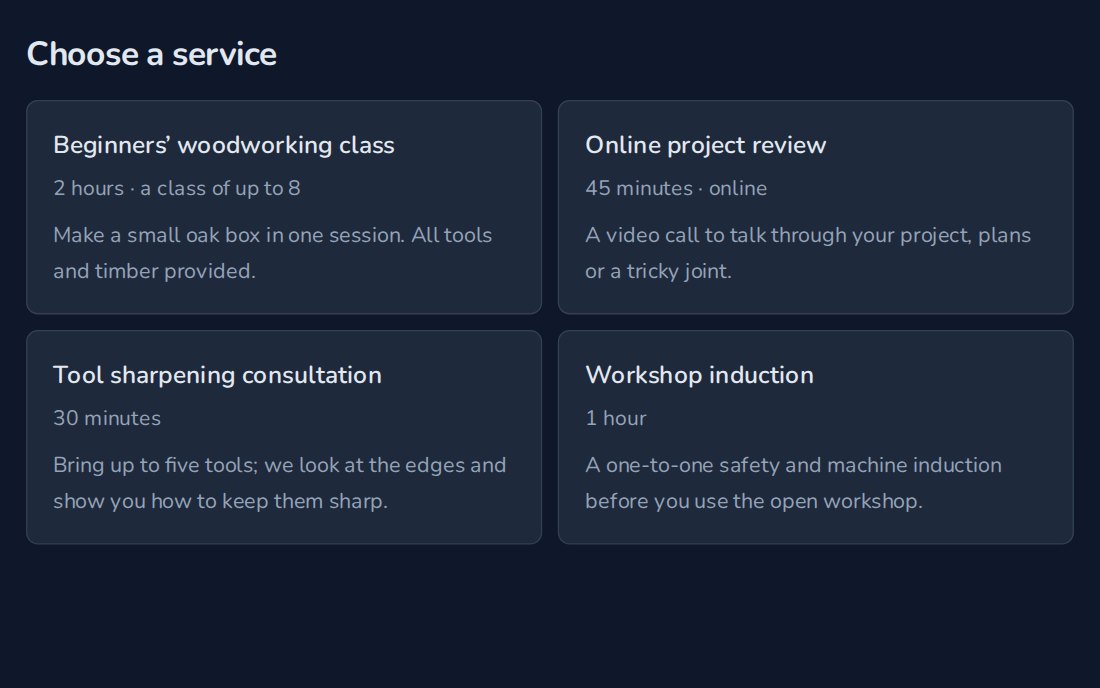
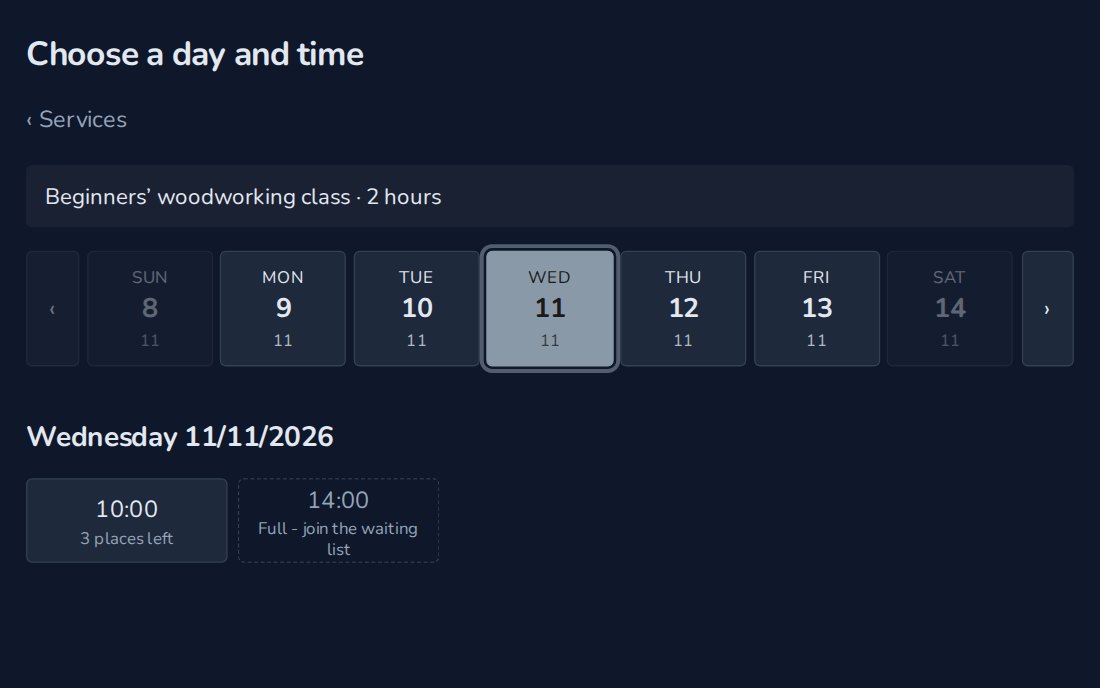
2. Pick a day and a time
Only times that are really free are offered. For a class, each time shows how many places are left, and a full one offers its waiting list instead.
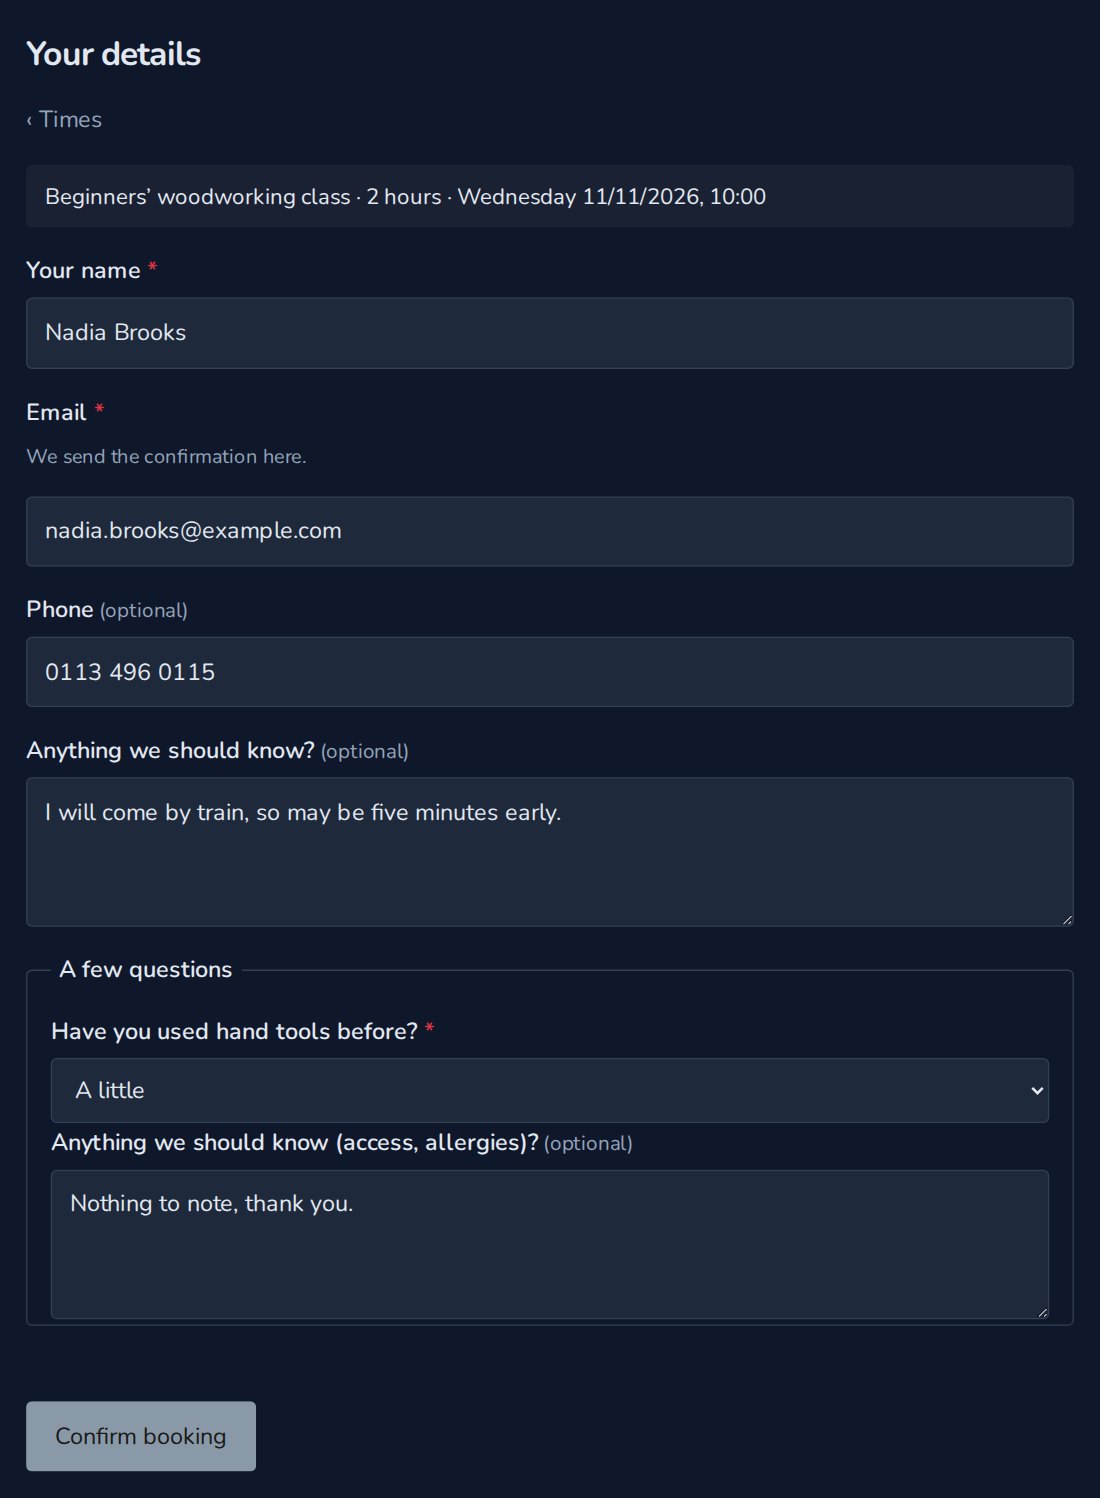
3. Answer your questions
Customers give their name, email and phone, and answer any questions you set for that service or class: experience level, what they are bringing, anything you need to know before they arrive.
4. Booked, on screen and by email
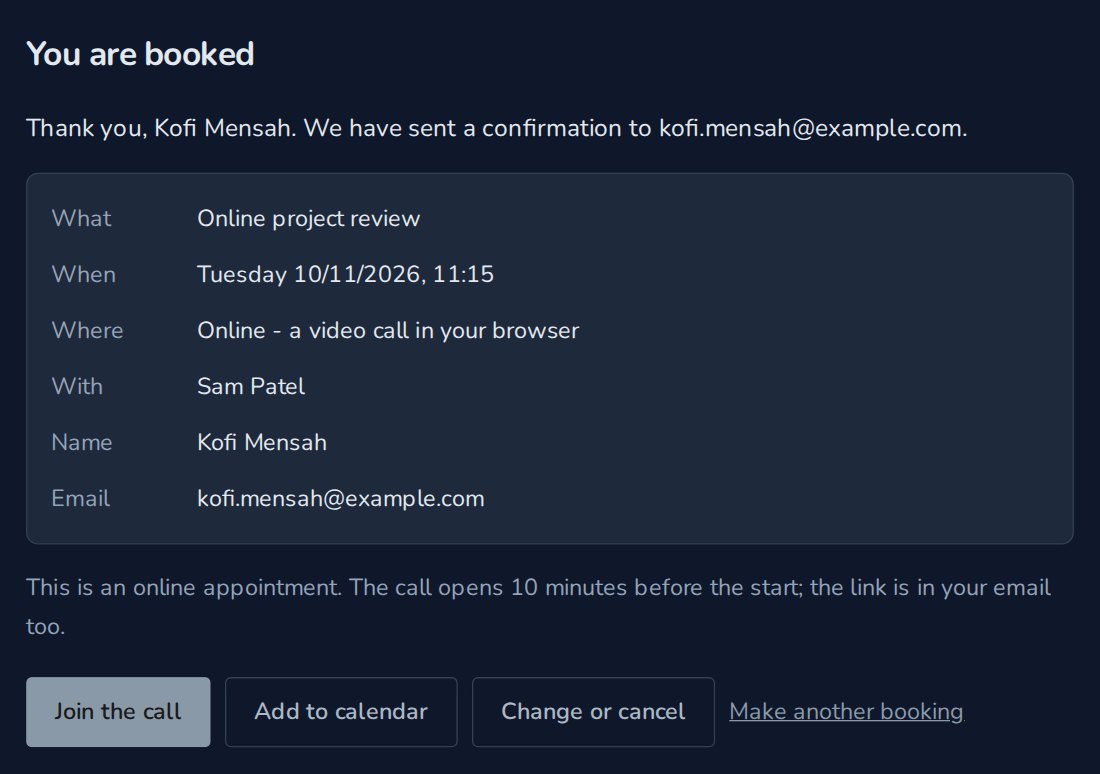
The confirmation appears straight away. For an online appointment it includes Join the call, so there is no separate link to hunt for. Add to calendar puts it in their own diary.
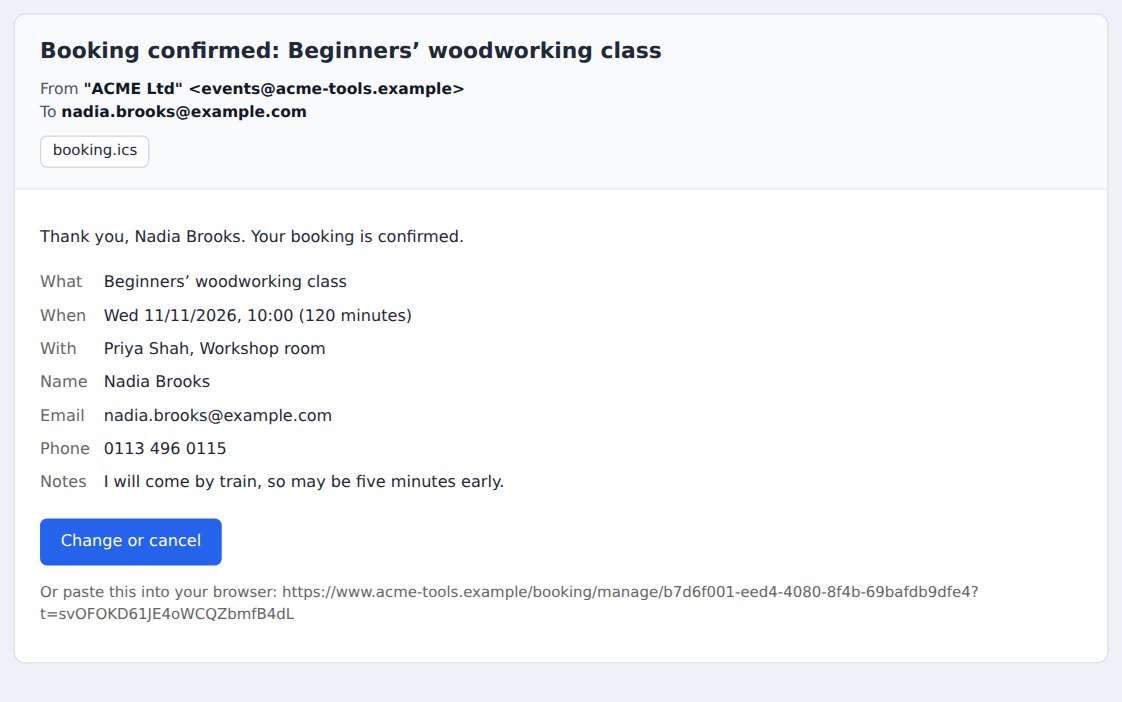
The confirmation email carries the same details, a calendar file, and the customer's own Change or cancel link.
5. When a class is full
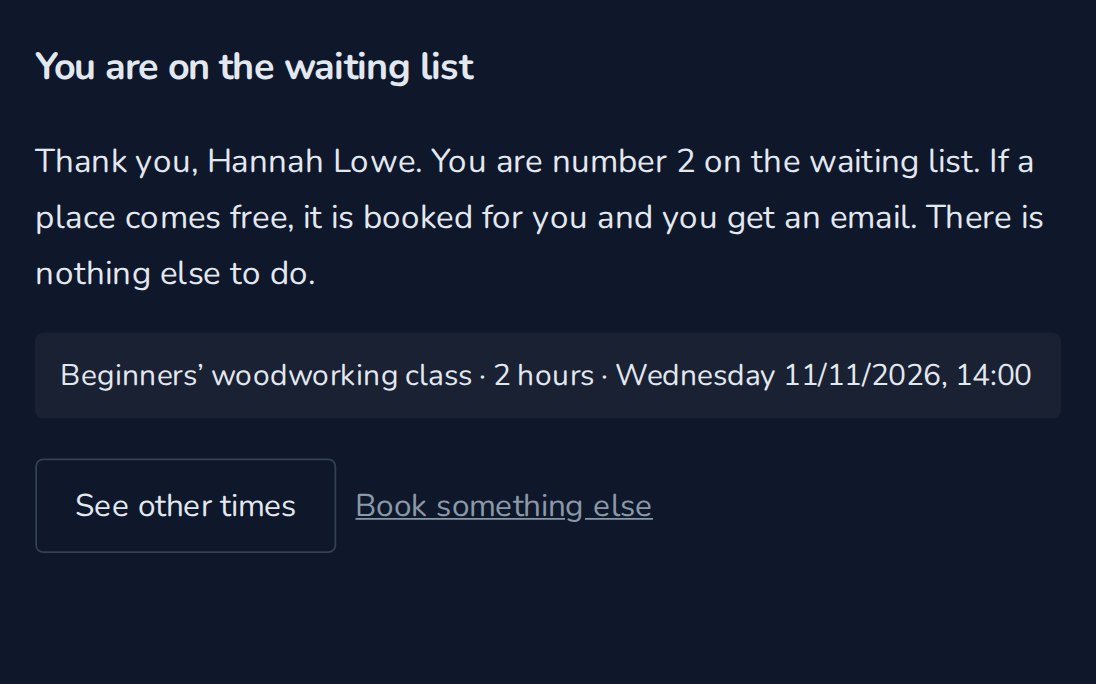
A customer who picks a full class joins its waiting list and is told their place in the queue. If someone cancels, the place is booked for the next person and they are emailed. You do not have to ring round.
6. Changing or cancelling, without ringing you
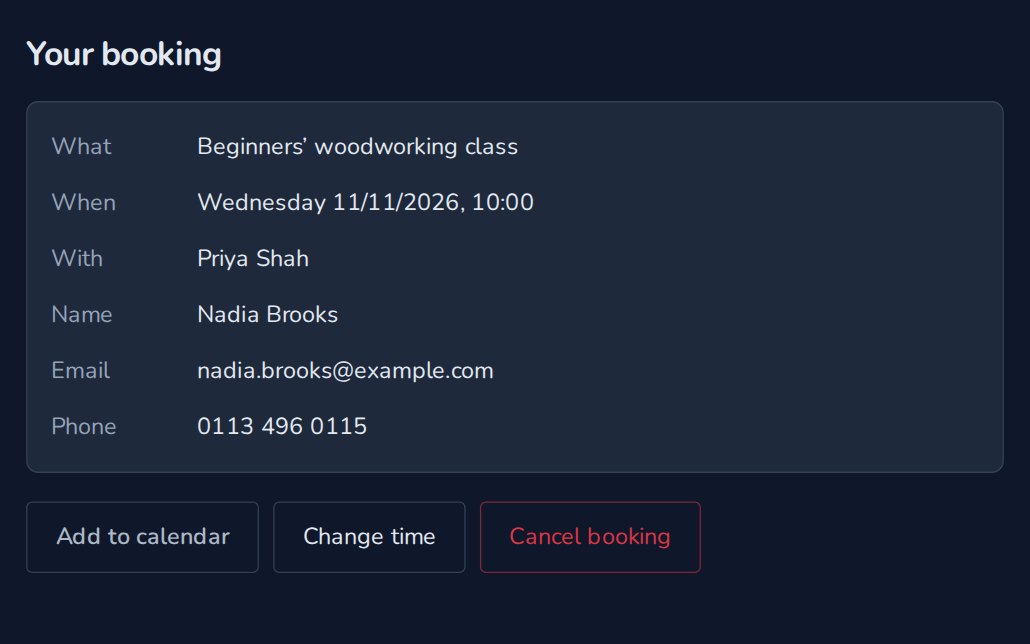
From the link in their email, customers can move to another free time or cancel, up to the notice you set. You are emailed either way, and a cancelled place goes back on offer.
7. Regulars, booked in one go
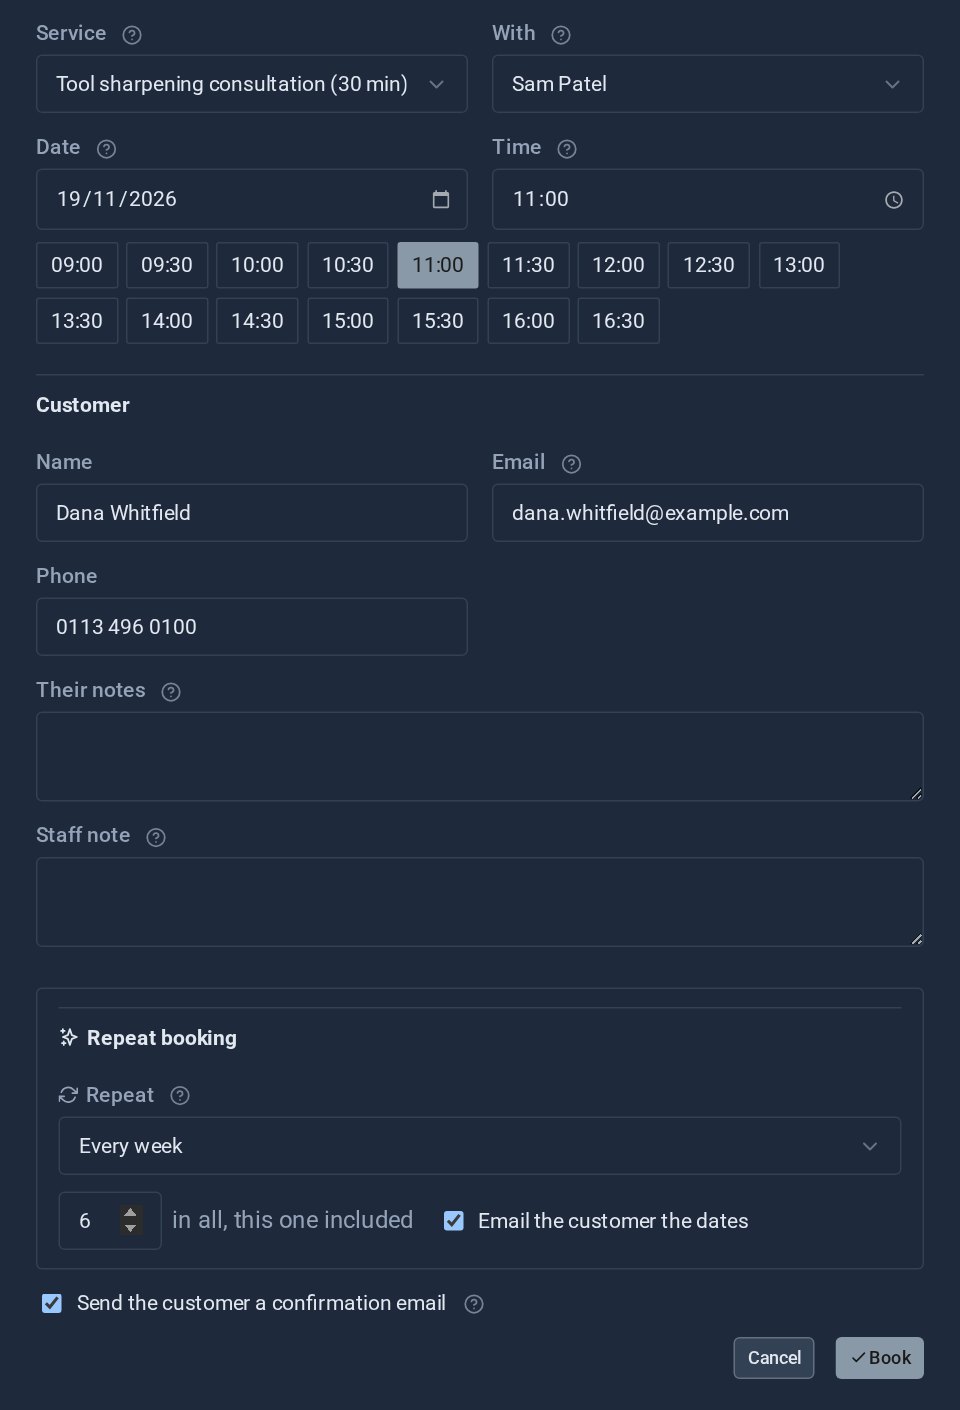
For a customer who comes every week, you can book the same time for several weeks at once from the admin, and email them the dates.
Before you go live
- Book something yourself, with your own email address.
- Check the confirmation email reads the way you want.
- Try the Change or cancel link.
- Fill a class and join its waiting list.
The screens above come from our made-up demo company, ACME Ltd.
Keep reading

How to turn your address book into a customer list with Contacts Pro
A step-by-step guide to setting up Contacts Pro for a small business: bring your contacts in, add the fields you track, give groups a look, never miss a birthday, and share customers with your team.

What happens when you sign up for a Domma CMS site
From choosing a plan to your first sign-in: what signing up for a Domma CMS site looks like, what it costs each month, and how you change your plan or Tools later without ringing anyone.
How to run a project with your client in the loop
A step-by-step guide to Waypoint Pro: set up a board with your own workflow, plan sprints, start issues from templates, keep a private project for one client, and let them follow along without being able to change a thing.