How to send an invoice and get paid, from your own site
A step-by-step guide to invoicing with the Invoices Tool: set up your details once, pick a layout, send a PDF by email, record payments as they arrive, and raise self-billing invoices for the suppliers you pay.
Small businesses lose hours to invoicing: a spreadsheet for the numbers, a word processor for the layout, an email client to send it, and a list somewhere of who has paid. The Invoices Tool does all of it inside your site, next to your customers and your shop.
This guide follows our made-up company, ACME Ltd, from a new invoice to a paid one.
1. Set up your details once
Open the cog and add yourself as an issuer: your trading name, address, VAT number and bank details. If you trade under more than one name, add each one. Then add your customers as receivers, or let them build up as you go.
Invoices numbers itself, for example INV-2026-0001. Numbers restart each year and are never reused.
2. Pick a layout
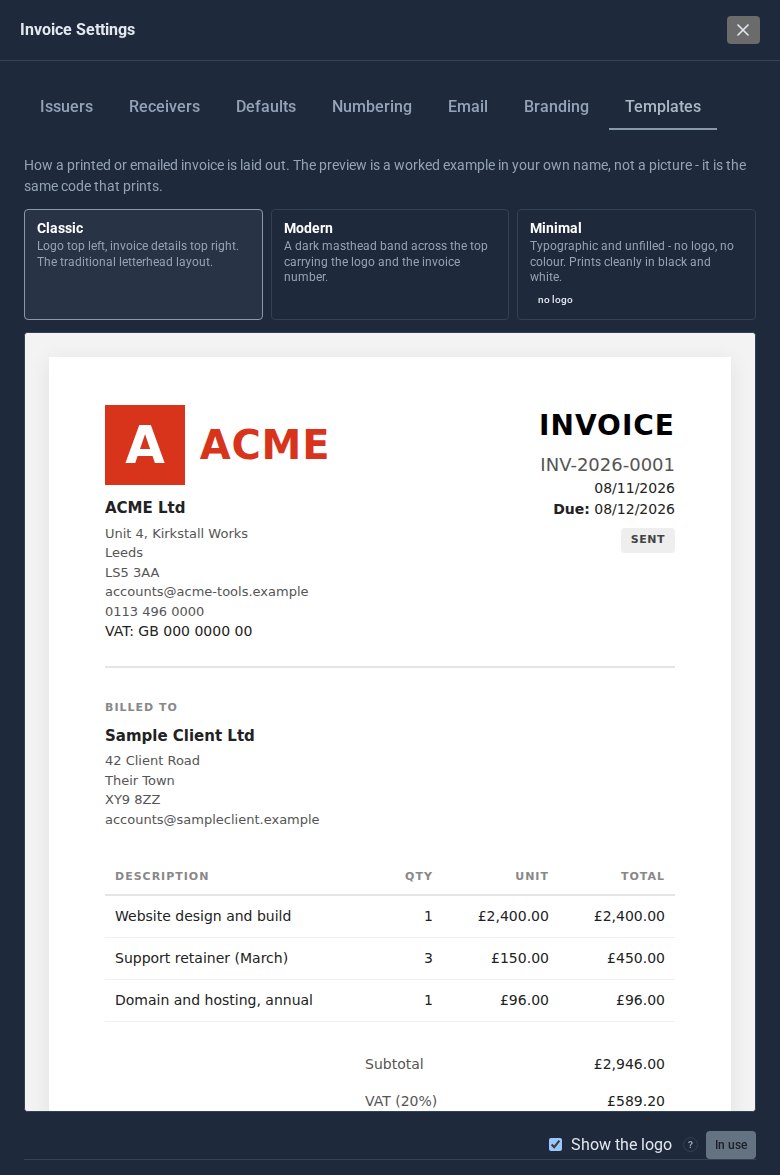
Under Settings > Templates there are three: Classic with your logo top left, Modern with a dark band across the top, and Minimal, which prints cleanly in black and white. Click one to preview it, then Use this template.
3. Write the invoice
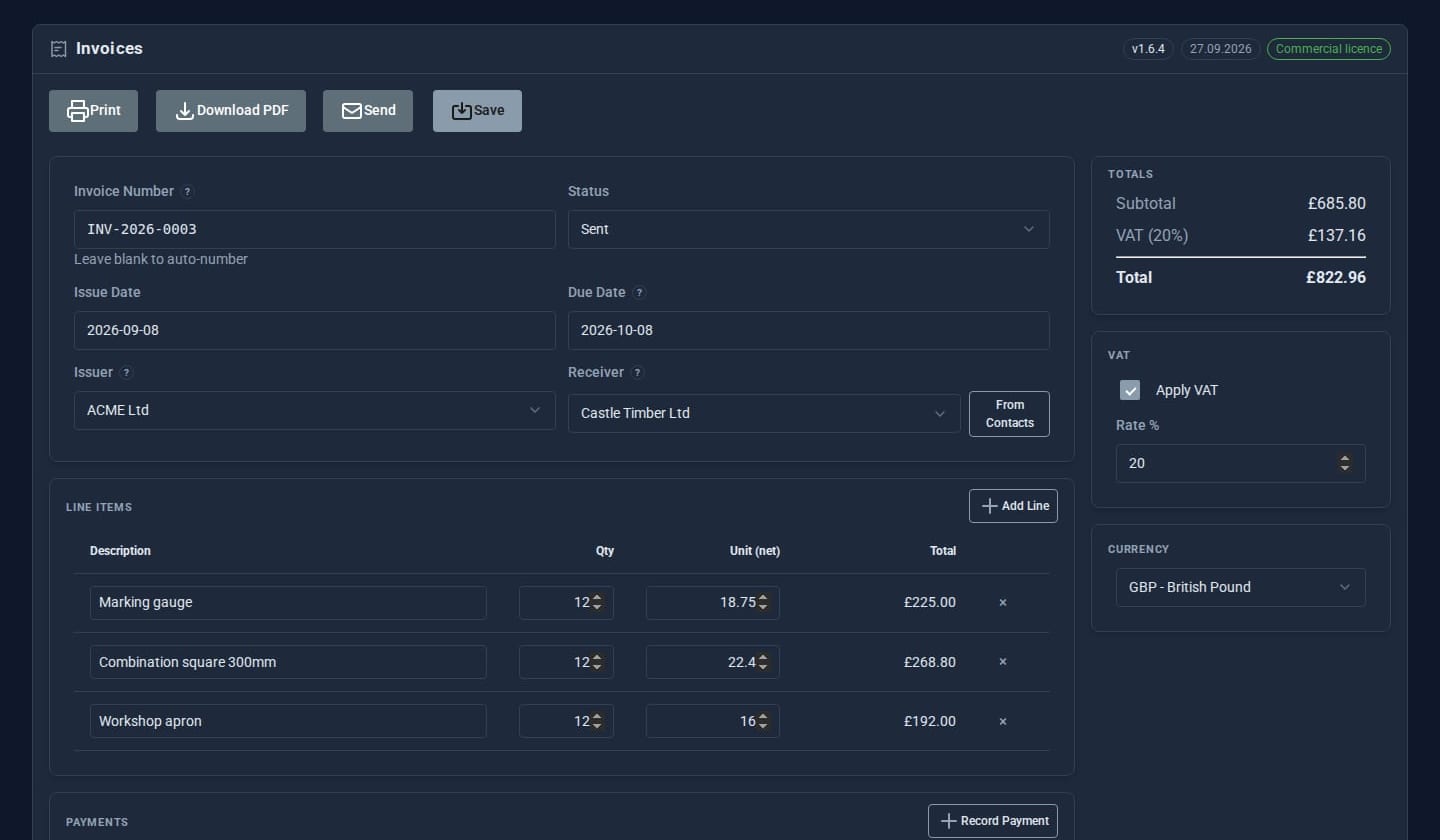
Choose the issuer and the customer, add the lines, and set the VAT rate and due date. The totals work themselves out as you type.
4. Send it
Click Send. The customer's address is already filled in, along with a subject and a short covering note you can change. If you use Contacts, Add a contact and Add a group pick more people to send to.
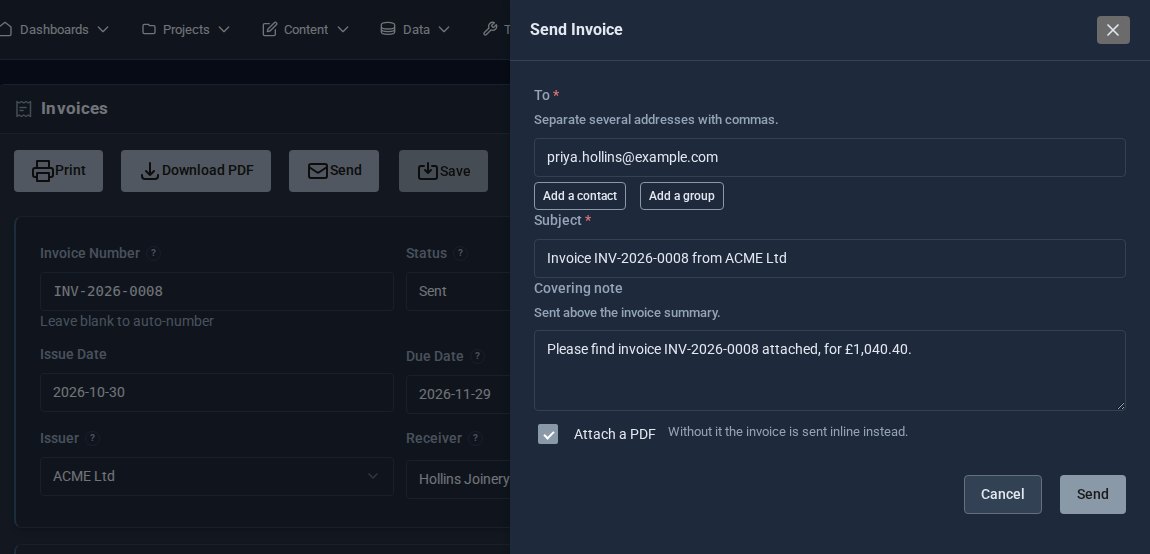
Leave Attach a PDF on and your customer gets a proper A4 invoice, with your bank details at the bottom. A draft becomes Sent.
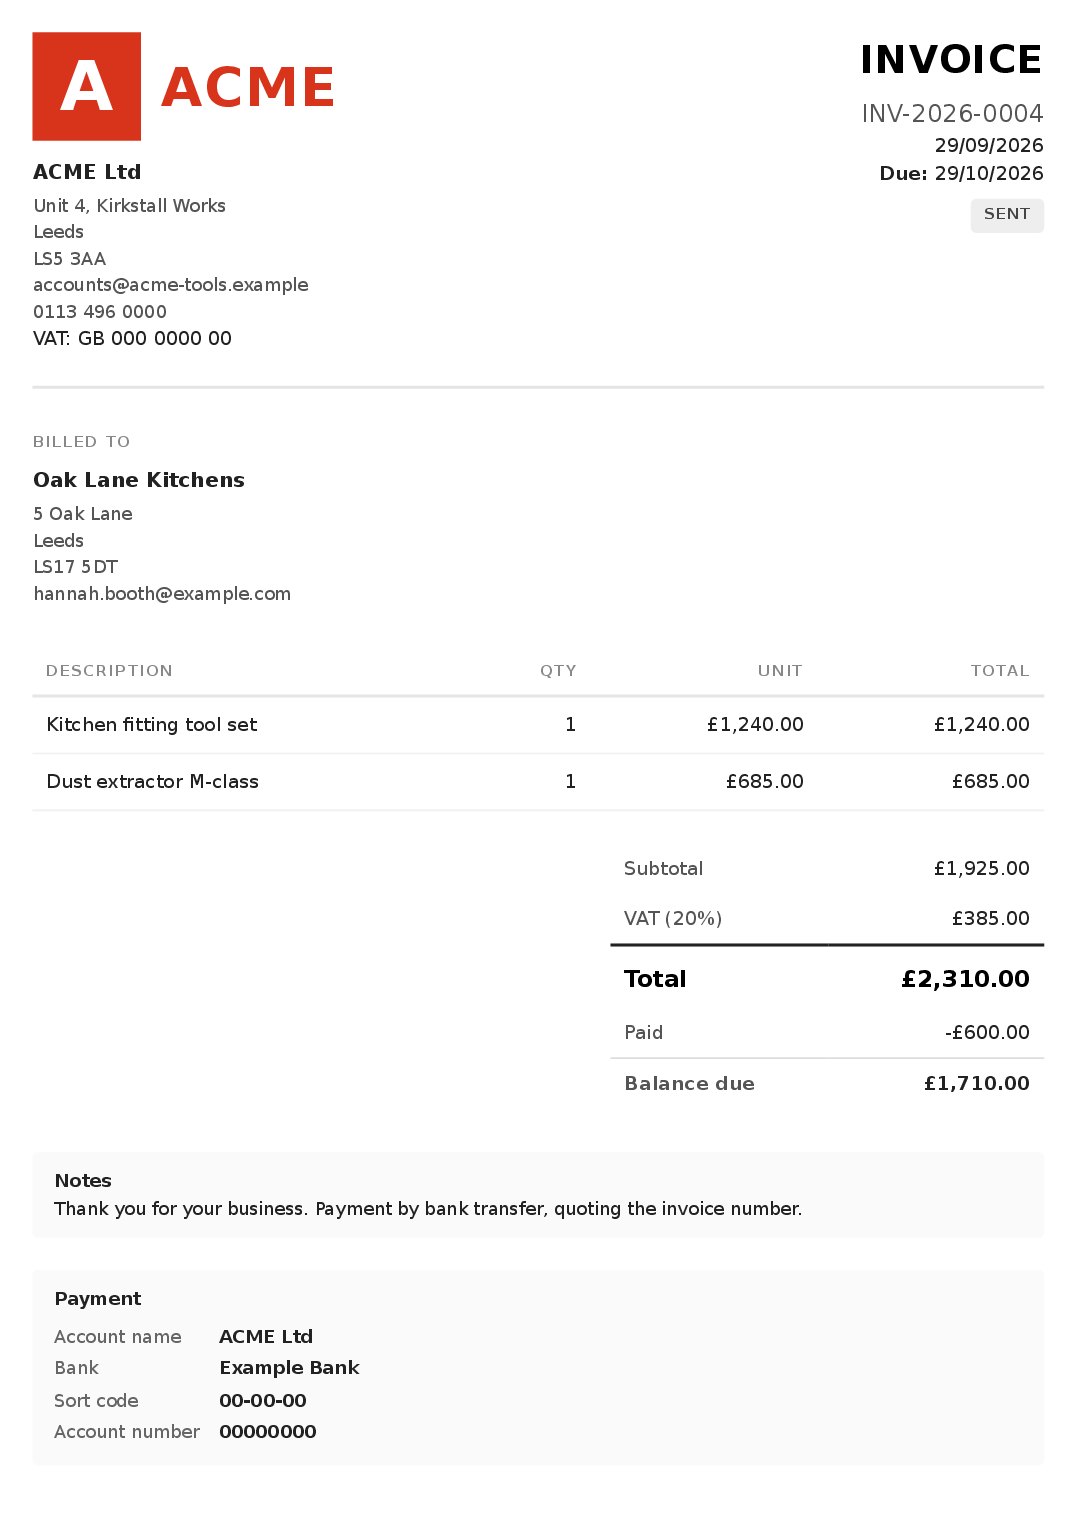
You can also Download PDF or Print it yourself.
5. Record payments as they arrive
When money comes in, record it on the invoice. A part payment leaves a balance, and the PDF shows what has been paid and what is still due. Once the balance is cleared, the invoice moves to Paid on its own.
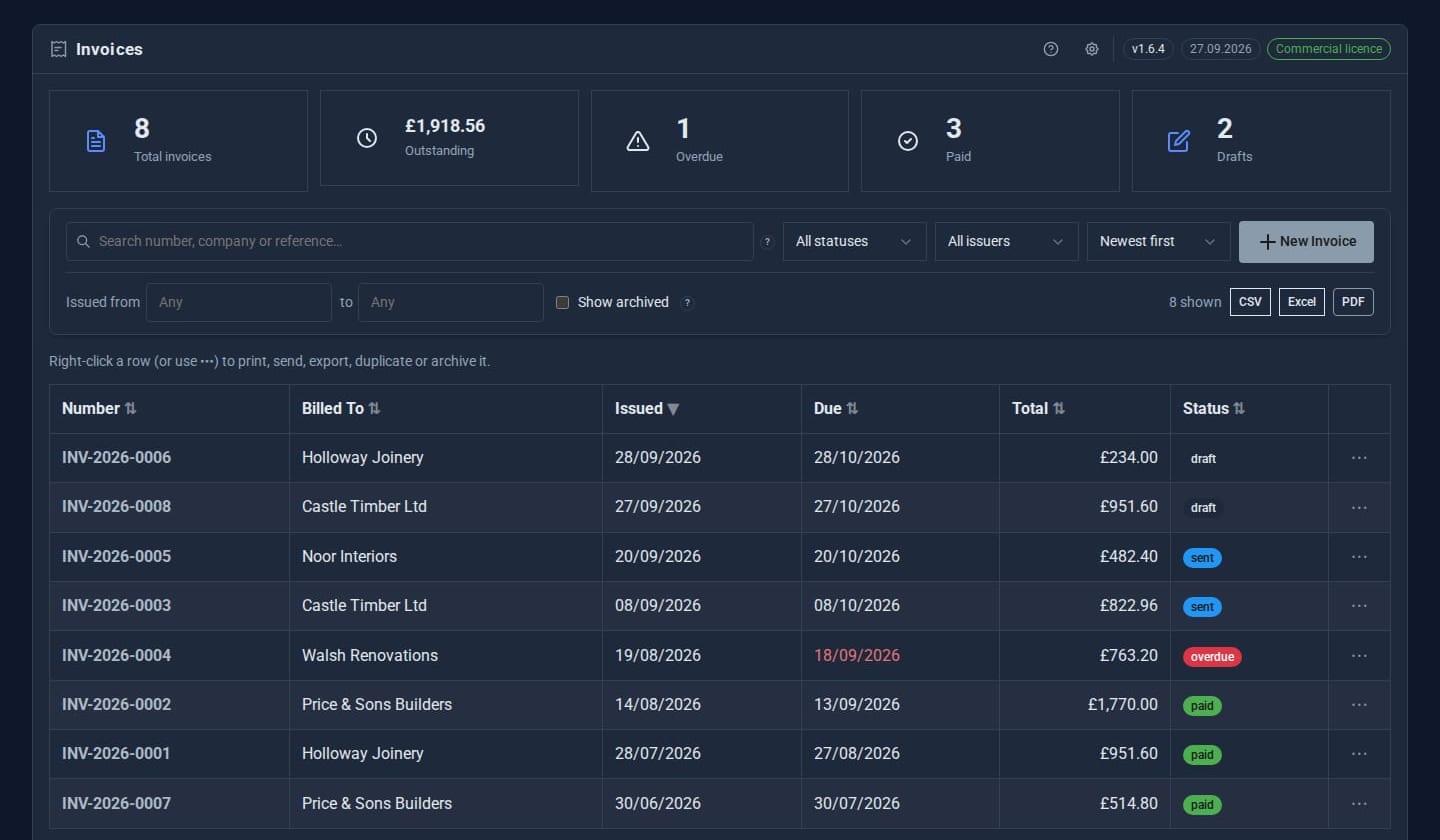
The list shows everything at a glance: what is outstanding, what is overdue and what has been paid. An invoice becomes overdue once its due date passes with a balance still to pay, and the sidebar badge turns red until it is settled.
6. Paying suppliers? Use self-billing
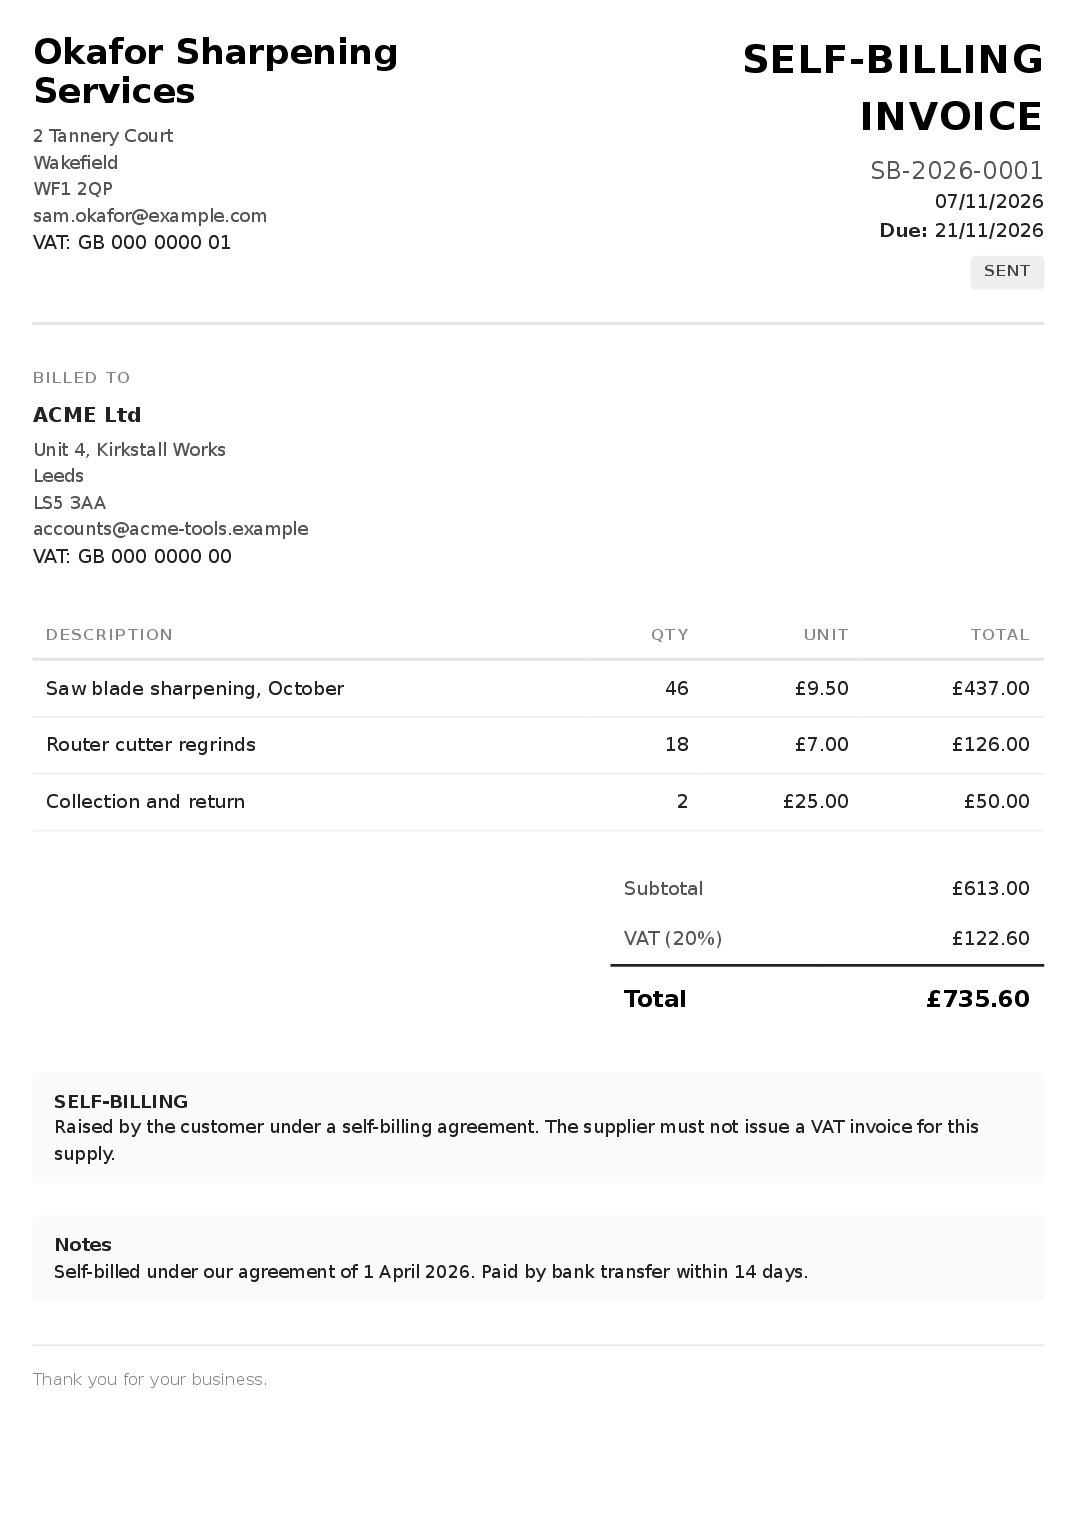
If you pay lots of small suppliers, such as contractors, tutors or a sharpening service, you can raise their invoices for them under a self-billing agreement. Mark the supplier as a self-billing supplier in Receivers, with the agreement date, review date and their VAT number. Then make an invoice with Kind: Self-billing.
It numbers in its own sequence (SB- by default), prints with the supplier as the issuer and you as the customer, and is marked SELF-BILLING, as HMRC expects. When an agreement's review date comes round, Invoices reminds you.
Quick checklist
- Add your issuer details and bank account once.
- Choose a layout.
- Write the invoice, then Send it with the PDF attached.
- Record each payment as it arrives.
- Keep an eye on the red badge for anything overdue.
Need to agree a price first? Invoices does quotes too: your customer accepts online and you turn the quote into an invoice in one click.
The screens above come from our made-up demo company, ACME Ltd.
Keep reading

What happens when you sign up for a Domma CMS site
From choosing a plan to your first sign-in: what signing up for a Domma CMS site looks like, what it costs each month, and how you change your plan or Tools later without ringing anyone.

How to run a project with your client in the loop
A step-by-step guide to Waypoint Pro: set up a board with your own workflow, plan sprints, start issues from templates, keep a private project for one client, and let them follow along without being able to change a thing.

How to get your news shared and posted without logging in to five networks
A step-by-step guide to Social Media Pro: make every page look right when it is shared, add share and follow buttons, and post to Bluesky, Mastodon, LinkedIn, Facebook Pages and X from one composer, now or scheduled.